Saturday, March 23, 2013

Green Goddess Dressing


Open any mid-century book on California Cooking and I guarantee you’ll find a recipe for one thing: Green Goddess dressing. (See three examples of my CA Cook Book collection, pictured above - all have it.) Since on St. Patrick’s day my friends and I had a “Green Food Till You Puke Pot Luck”, I decided one dish that I had to bring was Green Goddess Salad. It’s green, its slightly bizarre, and everyone loves it. (I also made green fondue, which is another story entirely, and rather disgusting.) See me and my friends in our green finery – Green Goddesses, all of us: 


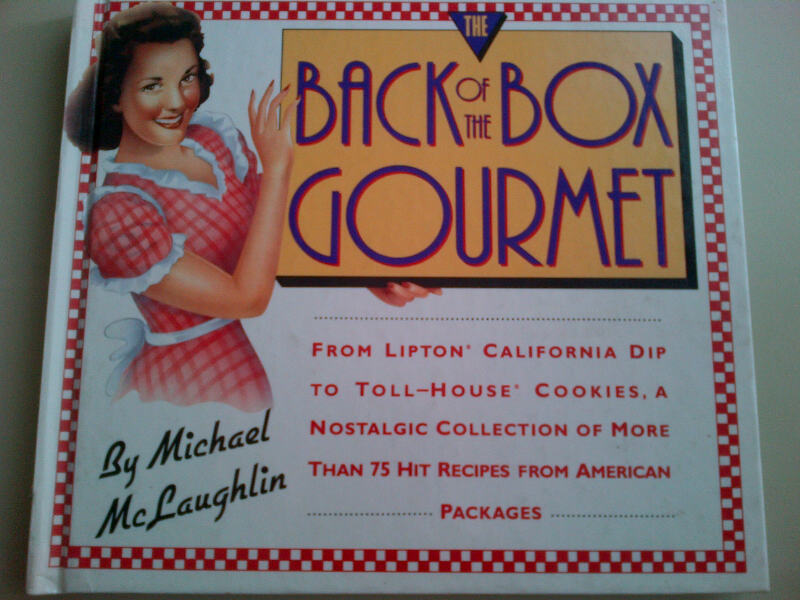
One of my favorite books on California Cooking is a 1950 edition of the “The New California Cook Book” by Genevieve Callahan. (pictured at top) Not only is it filled with tons of actually tasty things, but Genevieve is knowledgeable and chatty and tells us background on her recipes. She notes, for example, that Green Goddess Dressing was famously served at San Francisco’s Palace Hotel in honor of the English actor George Arliss, who appeared in a play called The Green Goddess in the 20s. (And to think, I had always just assumed it was some hippy BS!) The other thing I adore about this book is that the previous owner, Mrs. Vera A. McMillan, had written ALL OVER IT, and stuck clippings and other recipes in its pages. She clearly was a “Health Nut” who had saved coupons for “Dr. Fearn’s Soya Bean Capsules” and other delights. I am sure she knew my grandmother.


This dressing is simple and everyone loves it, but one thing that always bugs me is that I have never seen “tarragon vinegar” for sale anywhere. Was this something that went away over time? A culinary mystery. Instead, I used white wine vinegar and some dried tarragon. Also, you can adjust the amount of mayonnaise and sour cream to taste in case you prefer one to the other, and “heavy cream, soured” is just sour cream. Some variations on this recipe call for onion juice (1 tsp) or onion and/or garlic powder (very 50s). Finally, to make a dip for veggies rather than a salad dressing, eliminate the mayonnaise entirely, and you can also eliminate the anchovies (which are said to be a later addition anyhow) and it is still excellent.


Green Goddess Dressing

1 clove garlic, grated
3 Tbsp finely chopped anchovies, or anchovy paste
3 Tbsp finely chopped chives or green onions
1 Tbsp lemon juice
3 Tbsp tarragon wine vinegar
½ cup heavy cream, soured
1 cup mayonnaise
1/3 cup finely chopped parsley
Salt and coarse black pepper

Combine ingredients in order given. Chill, then pour liberally over coarsely torn mixed greens – roamine, chicory, and escarole or head lettuce and leaf lettuce. Toss until well-coated, adding more salt and pepper as needed. Serve in individual plates or bowls, to accompany the main course. You’ll mop up your salad plate with French bread when you finish! Makes about a pint.


Oh, did I mention I put just a drop of green food coloring in the dressing? You can barely tell... see, I saved most of it for the frosting on the green cupcakes above. Note also that the green fondue is cropped out of this photo. You're welcome!


Friday, January 25, 2013

Allspice (Pimento) Dram


I recently made some friends from Jamaica, and in addition to loving their music, I learned that we also share a love of healthy food including fish, fresh fruit and lots of spice.  They sang beautiful music to me, and I was happy to be able to give them things they appreciated in return: local San Francisco honey and Meyer lemons grown in Berkeley by my mother. Since then I’ve been looking at this adorable booklet of Jamaican recipes from 1963 (Leila Brandon’s Merry Go Round of Recipes from Jamaica) and wanting to make something, but much of the ingredients are extremely unfamiliar. A recipe for Pimento Dram caught my eye, which I know as an ingredient in many classic Tiki Drinks, and which I also know to be an expensive liqueur to purchase. Even the tiny vintage airplane bottle that I have once cost $8.70 (according to the
price tag still on it from the shop called “All Things Jamaican”) so I figured this project could save me some money. 
 
Rather than buying St. Elizabeth Allspice Dram for $25, which is indeed excellent but pricy (and in a tall bottle that annoyingly won’t fit in my cabinet) I decided to make my own. The procedure seemed simple enough, though Ms. Brandon’s recipe called for fresh allspice berries (which I couldn’t find) and lots of fresh lime juice (which might not be stable at room temp over time) so I went to the trusty Interweb to look for a different recipe, and was happily able to find a similar one, which I provide for you here. If you love the flavor of pumpkin pie spice (which comes mainly from allspice berries, also known as pimento), you’ll adore this liqueur. It takes a couple of weeks to make, but is well worth it.
 
In addition to traditional Tiki drinks, allspice dram is called for in many cocktails such as the delicious 1937 Lion’s Tail (see below) and also tastes yummy over vanilla ice cream or as a flavoring for a delicious flan. Brew some up today and thank me in a fortnight. 
 
Allspice Dram: 
 
1 cup light rum
¼ cup whole allspice berries
1 cinnamon stick
1 ½ cups water
2/3 cup brown sugar
 
1. Crush the allspice berries in a mortar and pestle or grind them in a spice grinder. You want coarse, large pieces and not a fine grind.
 
2. Place the crushed allspice in a sealable glass jar and pour the rum on top. Seal the jar and shake well. Let this mixture steep for 4 days, shaking daily. On day 5, break up the cinnamon stick and add it to the mixture. 
 
3. After 12 days total steeping, strain out the solids through a fine mesh strainer. Then strain again through a coffee filter into your final bottle or jar.
 
4. Heat water and sugar on medium until boiling, stirring to dissolve, about 5 minutes. Let the syrup cool, then add it to the strained allspice infusion. Shake and then let rest for a minimum of two days before using. (Yield: about 3 cups)
 
 
Lion’s Tail (1937)
 
2oz Bourbon
½ oz Allspice Dram
½ oz Line Juice
1 tsp. Simple Syrup
1 dash Angostura Bitters
 
Shake over ice, strain; serve straight up in chilled cocktail glass.

Tuesday, December 18, 2012

Children's Favorite Casserole


There is nothing easier to throw together after a long day than a casserole, and the League of Women Voters of Illinois knew this back in 1971 when they published this chic little “Hasty Lady” Cookbook. Filled with quick and tasty recipes, it also gives helpful tips, such as this gem:  “No time-saving device beats a well-trained 12-year-old”. SOLD!

Lots of yummy-looking recipes in here, but good LORD, there is a recipe for a casserole specifically For Children, made with BEER? I know, I know, the alcohol is cooked out… it just seems so funny! I do cook with booze all the time, and who doesn’t love a casserole?  Even though the “cheese mixture” had me a liiiiiittle grossed out, I decided to give it a try. 

Turns out, sure – it’s easy to whip up, and fairly tasty. It wasn’t my own child’s favorite, though, because I think, even at eight, she prefers champagne.


Children’s Favorite Casserole

1 lb. ground beef
1 Tbsp oil
2 8 oz. cans tomato sauce
1 6 oz.  can tomato paste
1 cup beer
1 tsp salt
½ tsp Tabasco
½ tsp. oregano
1 cup cottage cheese
8 oz. cream cheese
½ cup sour cream
1 green pepper, chopped
8 oz. broad noodles, cooked and drained


Brown beef in hot oil. Add tomato sauce and paste, beer, salt, Tabasco , and oregano. Cook 10 minutes and remove from heat.

Mix cottage cheese, cream cheese, sour cream, and green pepper in a separate bowl.

Spread half the noodles over bottom of a greased 2 quart casserole or lasagna dish. Cover with cheese mixture, then with remaining noodles. Pour beef sauce over top.

Bake at 350 for 35 minutes.

Serves 4 heartily.  Easy to double recipe. Can be made night before of frozen before baking.

Sunday, October 7, 2012

Frito Pie


Being a child of the 70s and raised by an “Earth Mother” who did not allow processed foods of any kind, naturally I gravitated towards things like Fritos and other delightful snack foods, but usually as something I snuck and ate in my car or late at night. Ironically, it was my own mother who gifted me this very cookbook (“Carrie – Happy Easter 1993 Love, Mama”) and thus helped me learn to incorporate those “forbidden foods” into perfectly acceptable company dinners.

Recently I found myself with a surplus of chili (leftover from a campout with a Hillbilly theme, if you must know) and was too tired after the weekend to cook a meal. I didn’t want just leftovers, and my friends were shouting Frito Pie! Frito Pie! OK I have to admit I’d never heard of such a thing, but I knew right where to turn. Thank you, mom, for the book that teaches me to cook in ways that you never did.

Fritos brand corn chips were created by Texan Elmer Doolin sometime around 1932. (See? Vintage food, or course I love them. – CS) Beginning with a formula purchased from a Mexican cook, adapted from the authentic corn tortilla, Doolin parlayed his snack business into a national phenomenon.  Fritos brand Corn Chips Chili Pie, invented by Doolin’s mother, Daisy, is a baked dish of corn chips, chili, onions and cheese that soon became the Southwest’s equivalent of the tuna noodle casserole. The Walkabout (aka “Frito Boats” – CS), created by spooning chili, cheese and onions into an opened snack-size bag of Fritos brand Corn Chips, is eaten on the hoof with a spoon and is still enjoyed at drive-ins, rodeos, state fairs and the like. (“The Back of the Box Gourmet”, Michael McLaughlin 1991)

 Basically, you throw chili (be it leftover or a can) into a casserole with Fritos, onions and cheese, and bake it. So Easy! So Good! Please note, though, that as much as I love to sneak junk food, I will not and cannot eat American Cheese, so I used cheddar. See, mom, at least some of what you taught me stuck!


CHILI PIE CASSEROLE aka “Frito Pie”

3 large cups Fritos brand Corn Chips, divided

1 large onion, chopped

1 cup grated American cheese, divided

1 19-oz can chili

Spread 2 cups Fritos brand Corn Chips in a baking dish. Arrange chopped onion and half of the cheese on top of the corn chips. Pour chili over the onions and cheese. Top with remaining corn chips and cheese. Bake at 350 for 15 to 20 minutes or until hot and bubbly. Makes 4 to 6 servings.

Saturday, June 2, 2012

Orange Cupcakes


Celebrating a birthday calls for cupcakes, doesn’t it? In the past, I’ve been treated to entire trays of Hostess orange cupcakes studded with candles, but I decided to bake up my own, somewhat healthier, version for a friend’s recent birthday. As usual, I turned to the venerable Joy of Cooking (1975 version) for a recipe for Orange Cake, and adapted it to cupcakes, as follows.

Since I made mini-cupcakes, I didn’t have room to inject the cream inside, (the element that makes the Hostess product the chemical-filled delight that it is!) but that can be achieved with regular-size cupcakes and a baking syringe if you have the time and inclination. Otherwise, go nuts with the frosting instead (I used a basic cream-cheese frosting with orange and topped each cupcake with colored sugar) for a sweet little bite of cheer.

To note with cupcakes, especially mini ones: watch them as they bake, and test them as soon as you can smell the cake. Burned cupcakes aren’t the life of any party!


Orange Cupcakes

Have all ingredients about 70 degrees. Sift before measuring:

3 cups cake flour

Re-sift with:

¾ tsp. salt

3 ½ tsp. double-acting baking powder

Grate:

Rind of 1 orange

Into:

1 ½ cups sugar

Cream this until light with:

¾ cup butter

Beat in, one at a time:

3 eggs

Measure:

½ cup orange juice

½ cup water

2 Tbsp. lemon juice

Add the flour mixture in 3 parts to the butter mixture, alternately with the liquid. Stir the batter after each addition until smooth. Bake for 12-24 minutes; cool.


Orange Cream Cheese Frosting


Cream together 1 package or softened cream cheese and 1 package of powdered sugar. Add 1 Tbsp orange juice and the zest of ½ an orange, to taste. Spread lightly on each cupcake and top with colored sugar.

Sunday, January 1, 2012

Frosted Eggnog Logs


Not that I don’t eat cookies nearly constantly all year round, but the Holidays really seem made for them, and each year I delight in finding new and different recipes to make and share with my friends – I mean, to eat till I feel sick. This year my dear friend Lauryl sent me a link to an adaptation of a recipe she’s been making for years, and by coincidence, my dad’s wife also sent me a Xerox of an old recipe for the same thing! It was fate – I *had* to make them!

They really are the same recipe, the only difference being in the old recipe, you are advised to “shape the pieces of dough on sugared board into long rolls ½” in diameter.” Now I’m sure I could figure this out, but I don’t have a big board to use, and I’m not actually familiar with this technique, so I just hand-rolled little log shapes. The results are OK, but I think 1960 had something there, so I’m going to do them that way next time. SEE? The old ways are the best, people!

Below I’ve copied the new version, but see the image of the old page straight from some unknown magazine, dated December 1960. I don’t care which recipe you use, but you’ll be happy you tried these rummy delights! Make up a batch and share them – or keep them all to yourself!


Frosted Eggnog Logs

From Lauryl Berg (adapted from Cooks.com)


Cookies:


3 c. flour

1 tsp ground nutmeg

1 c. butter

¾ c. sugar

1 egg

2 tsp vanilla

1 tsp rum


Frosting:

3 Tbsp butter, softened

½ tsp rum

½ tsp vanilla

2 ½ c. powdered sugar

2-3 Tbsp cream or milk

Food coloring (optional)


Cookies: in a mixing bowl, stir together flour and nutmeg. In a large bowl, bear butter for 30 seconds. Add sugar and beat until fluffy. Beat in the egg, vanilla and rum until combined. Add dry ingredients and beat well. Shape dough into 3 inch logs, about ½ inch wide. Arrange on ungreased cookie sheets. Bake 15 to 17 minutes or until golden brown. Cool on racks.

Meanwhile, prepare the rum frosting. Frost tops of the cooked cookies. Mark frosting lengthwise with fork to resemble bark. Sprinkle with additional nutmeg if desired. Makes 4 ½ dozen.

Frosting: Beat together softened butter, rum and vanilla. Beat in ½ cup sifted powdered sugar. Gradually add more sifted powdered sugar (about 2 cups) and cream or milk. Beat until frosting spreads easily. Tint with green food coloring if desired.

Friday, December 30, 2011

Best Oven Hash


Despite the fact that I grew up in Berkeley, to me the term “hash” still means a hearty meal, not something to put in a pipe. And happily, my Very Best Friend in the World, Miss Karen Finlay, not only agrees with me, but recently invited me to her adorable home to cook up some hash together. (see us LIVE in action here!) And not just any old hash, friends, we cooked up the Best Oven Hash from Karen’s 1963 copy of Better Homes & Gardens’ “So-Good Meals”. So, how was it, you ask? So-Good!

Not only is Karen my Very Best Friend in the World, but she is also totally Fabulous AND sells Tupperware. (click here to buy some now!) Also, we are Sin Twisters. That, for anyone who doesn’t know, is like Twin Sisters, but much more exciting. It means, in our case, that we were born at the same hospital in southern CA, (though we both grew up in different Bay Area towns), and somehow, all these years later, we’re still often confused for each-other…. Something I consider a high honor, indeed.

Anyhow, back to the hash. This is a dish that Karen has been making for years, and its always a hit. We swapped ground turkey for beef (in our efforts to “reduce”) and used frozen potatoes, just as our mid-century predecessors would have done. We also made use of some fine Tupperware products that you can purchase for your very own here!

Karen and I baked up the hash, threw together a salad, and enjoyed it all with a delicious cocktail made by videographer extraordinaire, Jon. Try this at home and we’re sure you’ll agree – this is the BEST oven hash EVER! (Note: photos are from a second batch that Ivy and I made at home, using Tupperware's predecessor, the Slap n Chop!)


Best Oven Hash

Better Homes & Gardens “So-Good Meals” 1963


1 ½ cups coarsely ground cooked beef (*we used turkey)

1 cup coarsely ground cooked potatoes (*we used frozen)

½ cup coarsely ground onion

¼ cup chopped parsley

1 tsp salt

Dash pepper

2 tsp Worcestershire sauce

1 6-ounce can (2/3 cup) evaporated milk

***

1/3 cup slightly crushed corn flakes

1 Tbsp butter or margarine, melted


Lightly mix beef, potatoes, onion, parsley, salt, pepper, Worcestershire sauce, and milk. Turn into greased 1-quart casserole. Mix corn flakes and butter, sprinkle over top. Bake in moderate oven (350 degrees) 30 minutes or till heated through. Pass catsup and mustard. (note: Ewwwww!!! No catsup or mustard needed!) Makes 4 servings.